

- The Best Empty Flip Top Bottles for Home Brewing - May 18, 2022
- The Best Kegerator Conversion Kits Worth Buying - May 18, 2022
- Secondary Fermentation Explained: Is It Worth The Effort? - September 16, 2021
Whether you have a kegerator already or you’re thinking about getting a Kegerator, you need to have a good understanding of the parts included in the unit. This will help you diagnose issues when suds don’t seem to be flowing smoothly. It will also help you take it apart to clean it and put it back together properly.
Knowing how your kegerator works will allow you to keep your beer fresh and keep your kegerator operating smoothly at all times. In this Kegerator Parts Guide, I’ll break down the key components and explain them in detail. I’ll also cover some lesser-known parts and why they’re important.
Why You Might Need Parts
There are several reasons why you might need to order individual parts for your kegerator. The primary reason for ordering new parts for your kegerator is to replace old or non-working parts. As with anything in your home, parts can wear out over time and may occasionally need to be replaced.
However, some people order individual parts for the purpose of building their own kegerator. This is a fun project that allows you to customize your machine. You can also save money by using an old refrigerator you may already have at home.
Kegerator Parts Overview
Here are some of the key components of every kegerator. These parts are necessary, no matter what kind of kegerator you have.
Regulator and CO2 tank
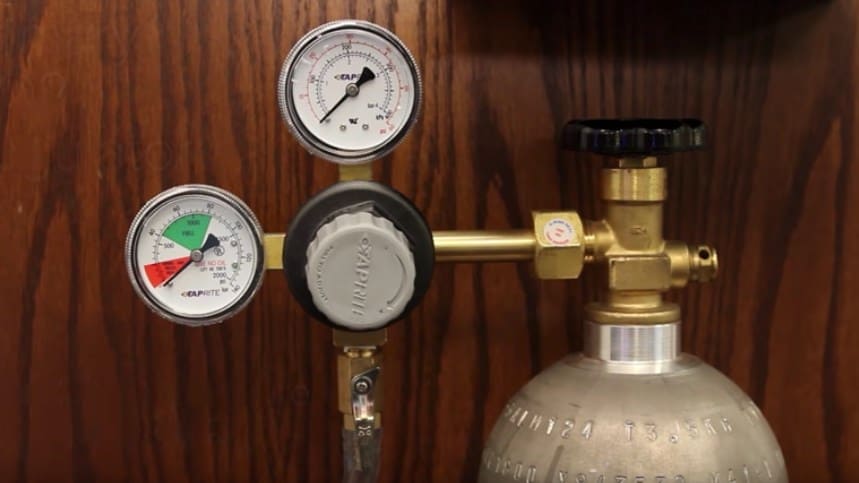
Kegerators dispense beer by using CO2 gas to force it through a line from the keg to the tap. The CO2 gas comes from a tank. Some kegerators only have one CO2 tank to pressurize one or more barrels, while other configurations have more than one tank to provide unique pressure to several different barrels.
Most CO2 chambers are controlled by a gauge, but some have buttons that make it easier to get a more precise measurement. The correct carbonation and temperature of the refrigerator will depend on your type of beer.
The CO2 gas typically flows into the gas line, through a CO2 inline channel, and into the barrel. These gas lines are normally 5/16 inches and made of surgical grade tubing for sanitation and cleanliness. Snap-on clamps work to secure the gas line to the CO2 regulator to keep it from leaking.
The parts included in the CO2 cylinder are:
- Tank
- Regulator(s)
- Gas line
- Inline gas channel
- Barrel fitting
CO2 tanks come in 5 standard sizes including:
- 2.5 pounds
- 5 pounds
- 10 pounds
- 15 pounds
- 20 pounds
The size you choose will depend on how large your kegerator is and how much beer you’re dispensing.
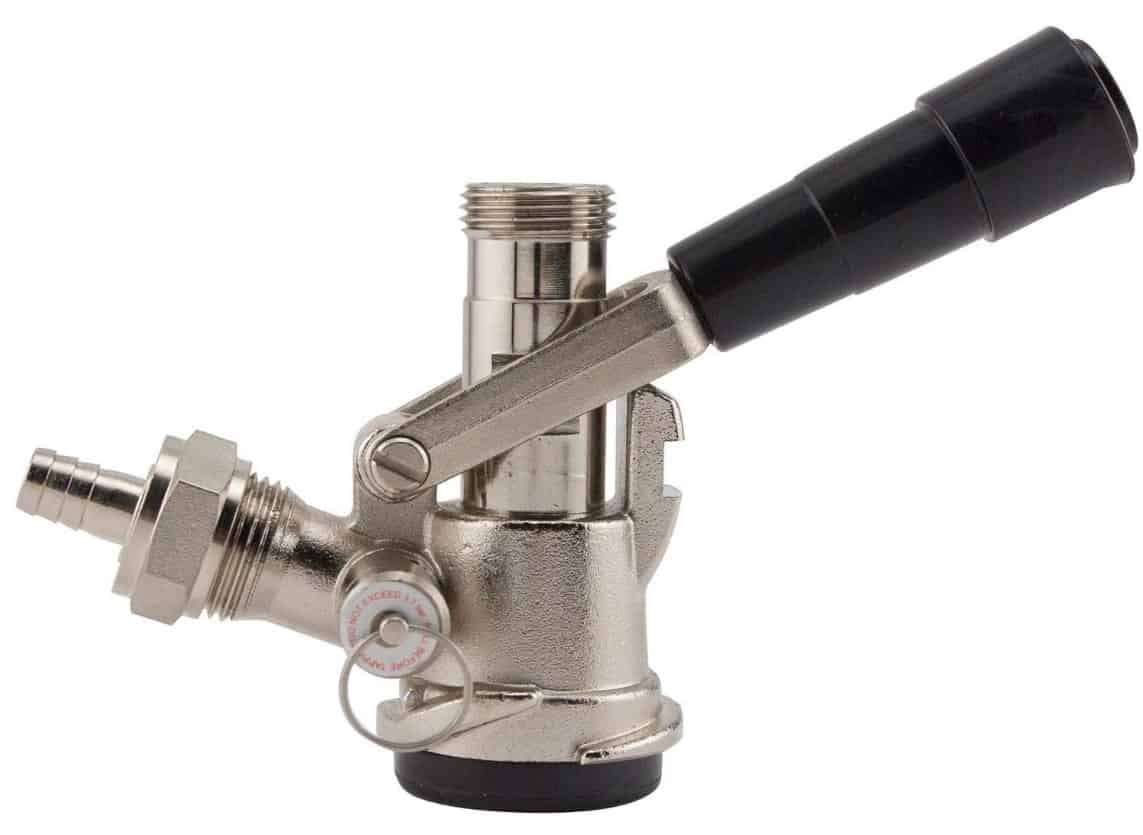
Keg
Arguably the most important component in a kegerator is the keg. There are many different sizes of kegerators to accommodate many different sizes and numbers of kegs. You may have the same size kegerator for one large barrel or two smaller ones.
Kegerators take standard and Cornelius barrels. For a standard barrel, the CO2 enters directly into the barrel opening, but for a Cornelius barrel, it passes through a ball or pin lock fixing.
Ball-lock fittings allow you to connect the CO2 fitting on the inside while the lager line fits onto the outside. Pin lock fixings adjust to accommodate the 2 pins on the CO2 in-line and the 3 pins on the beer-out line. This configuration prevents you from connecting the hoses the wrong way.
Lager lines can be the same 5/16 inches of surgical grade tube that you use for the CO2 line, but there are a lot of other types of tubes that people prefer now. In some cases, a larger tube produces over-foaming, so a smaller tube may be more beneficial. However, smaller tubes may need adapters to fit over the fixtures at either end.
The primary components of the keg are the barrel itself, the barrel tap or fitting, and the lager line, made from surgical grade tubing or another sanitary material. Often, a neoprene washer is used to connect the beer line to the keg coupler to keep the connections well protected.
The most common keg sizes are as follows:
- Homebrew – 9 inches in diameter x 23 inches tall
- Sixth barrel – 16 ⅛ inches in diameter x 13 ⅞ inches tall
- Quarter barrel – 16 ⅛ inches in diameter x 13 ⅞ inches tall
- Slim quarter – 11 ⅛ inches in diameter x 23 ⅜ inches tall
- Half barrel – 16 ⅛ inches in diameter x 23 ⅜ inches tall
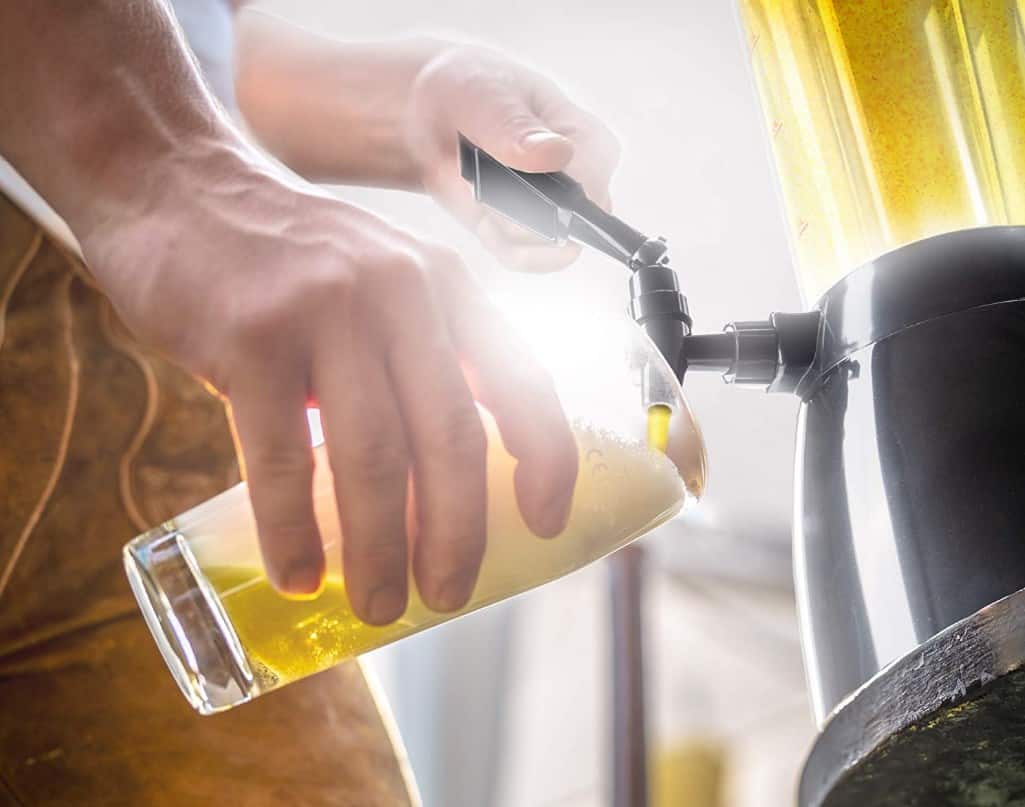
Shank, beer line, and faucet
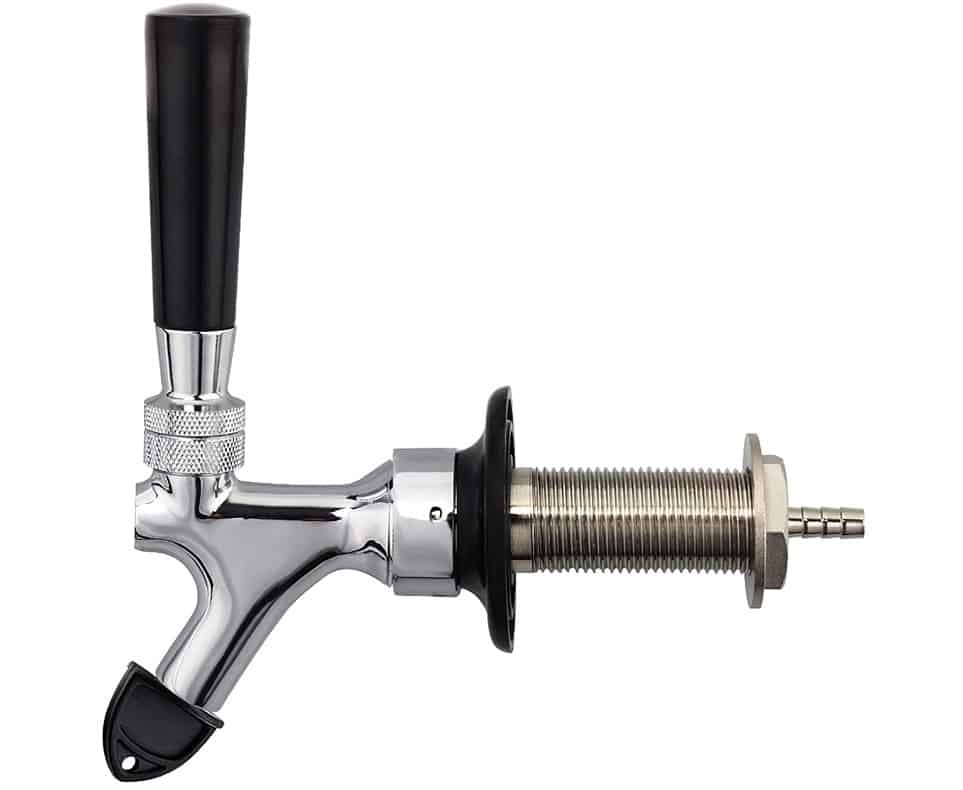
After your beer leaves the barrel, it travels through the beer line and into the shank. For a door-mounted kegerator, there’s a hole in the door of your refrigerator. The shank is the part of the kegerator that sits inside the door. Draft towers also have shanks that sit inside the hole in the counter.
The faucet (also known as the fixture or the tap) is connected to the shank on the outside of the refrigerator or at the top of the draft tower. It’s what dispenses your beer. Some people choose to use different types of fixtures for different beers. Heavy beers require fixtures that dispense them at a slower rate than lighter beers. There are also European-style spigots that have longer spouts to help control frothing issues.
No matter what kind of faucet you use, every tap needs a handle for labeling and dispensing purposes.
After the beer leaves the tap, it enters your glass. How much spillage you experience will depend on frothing or how many glasses you’ve filled prior to your current pour.
Drip tray
The beer has nearly completed its voyage. The only place for it to go now is in your mouth. However, almost every kegerator also has a drip tray to catch anything that continues to leak from the faucet after you remove your glass.
Drip trays are made from all kinds of materials, but because they’re visible on the outside of the kegerator, some people prefer for them to look more stylish. Stainless steel is beautiful, easy to clean, and resistant to rust.
Additional Terms and Extra Parts
Other than the main components of a kegerator, there are some additional terms and other parts that may be included on some kegerators. It’s important to understand that while not every kegerator includes these parts, they’re essential for some styles and purposes.
Beer tower
The beer tower stands vertically on the countertop of a built-in kegerator. This tall tube holds the beer lines that deliver the beer from the barrel to the tap. Most beer towers are tall enough to accommodate most glass sizes under the faucet, including a pint.
Guard rail
Not every kegerator has a guard rail, but they provide a certain aesthetic element to built-in kegerators and are useful if you’ve had a few too many already. They hold your glass in place while you pour and keep it from spilling or tumbling to the floor.
Cylinder holder
While the name is self-explanatory, it’s an important feature that many people overlook. Some kegerators have cylinder holders and some don’t. However, it works to keep your CO2 cylinder in place so you experience more consistent pressure.
The holder can be placed wherever it’s convenient for you and your kegerator, It’s normally placed at the back where it’s out of sight, but it can also be placed inside or outside of the kegerator, as long as the lines have access to the barrel.
American Sankey keg coupler
Another important component to any kegerator is a Sankey keg coupler or System D coupler. Unfortunately, not every kegerator comes with the connection needed to attach the beer line to it, and you may find that you have to purchase yours separately.
This is a uniform coupler that most American brewing companies use for their kegs. They’re secured by simply twisting them into place.
Metal keg floor support
The keg floor is one of the most important parts of the kegerator. It has to be strong enough to support the weight of your keg, which may be as much as 170 pounds. It also should provide enough insulation that cold air doesn’t escape through the bottom, making the entire unit more efficient and keeping your beer at a consistent temperature.
Casters
Portable kegerators have casters on the bottom that make it easier to move from room to room. These wheels allow you to move your kegerator, often while it’s still full. The casters come equipped with washers on the front wheels to help support the weight and prevent damage.
Wire shelves
Some kegerators come with optional shelving that you can use to convert your kegerator into a normal refrigerator. This improves its versatility and ensures that if you ever want to stop using it as a kegerator, the refrigerator isn’t rendered completely useless.
Faucet wrench

Not every kegerator comes with a faucet wrench, so you’ll definitely want to purchase one separately if you don’t have one. It’s a tool that helps you change out the faucet on your beer tower or refrigerator door.
While you can change them out without this tool, it makes it so much easier. They come in a uniform size that fits nearly every faucet.
FAQs
Understanding the most important kegerator parts helps you configure your unit to your specifications based on the type of beer you like to drink. These frequently asked questions may help you understand more.
Question: Do you turn on CO2 before tapping a keg?
Answer: To start, only open your CO2 tank about a quarter of the way. You can use the regulator to adjust the pressure. If you try your beer and it doesn’t seem to be enough, you can continue opening it by quarter turns until your desired pressure is reached. After opening the CO2 tank, it’s normal to see condensation on the faucet.
Question: How long should I let a keg settle before tapping?
Answer: If your keg has been agitated, let it settle for 1-2 hours before tapping it to prevent foam. Make sure your faucet is turned off before tapping to avoid leakage. It’s also a good idea to let your keg sit on ice for 3-4 hours before tapping it.
Question: Do you leave the CO2 on in a kegerator?
Answer: If you plan to consume the keg soon, it’s important to keep the CO2 tank on so it can regulate the pressure and keep it consistent. Keep the CO2 tank on while you serve it. If you don’t partake of your keg very often, you can turn the CO2 tank off, but you have to remember to turn it back on again before you consume it to allow it time to pressurize.
Question: Can kegs explode?
Answer: Kegs are designed to withstand as much as 120-130 PSI, which is far more than the pressure needed for beer, which is between 35 and 55 PSI. Even if a keg fails, the seals are designed to fail first, allowing pressure to escape so the entire keg doesn’t explode.
Final Thoughts
A normal kegerator configuration isn’t too complicated and understanding its parts will help you install it and keep it working properly. Get acquainted with the components so you can produce perfect pours with ideal carbonation and temperature.
Hopefully, you have a better idea of what parts are necessary in a kegerator and what extras may improve your experience.