

- The Best Empty Flip Top Bottles for Home Brewing - May 18, 2022
- The Best Kegerator Conversion Kits Worth Buying - May 18, 2022
- Secondary Fermentation Explained: Is It Worth The Effort? - September 16, 2021
Most homebrewers long to be self-sufficient when it comes to creating their own beers. It’s a fun culture where people take pride in the effort they put into their latest batch, no matter the cost. And hops can definitely be expensive to purchase.
But the good news is, you can learn to grow them at home on your own. It gives you a lot more control over your homebrew and you’ll be able to say you created it from start to finish on your own.
The Hop Plant
Hops are dioecious plants, which means there are plants of both genders. Unlike most flowers that contain both male and female reproductive parts in one unit, hops are either one or the other.
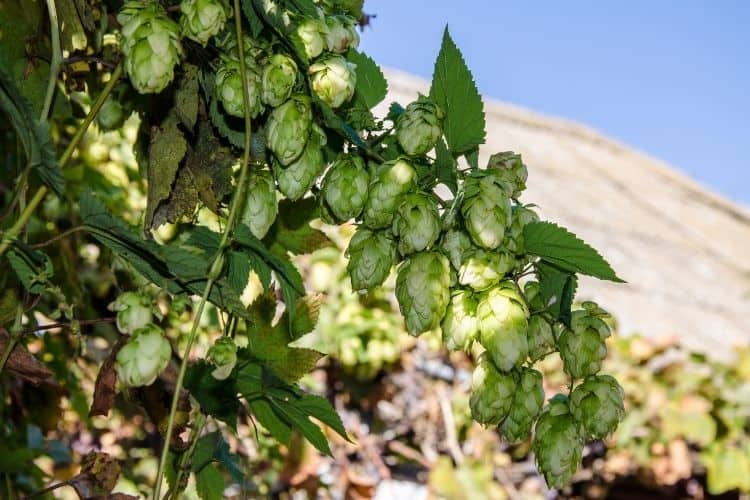
A female hop plant will flower and can be used for brewing. The male plant does the pollinating. Female hops are hardy and perennial. They give beer their characteristics like flavor, aroma, bitterness, and mouthfeel.
Hops also help to preserve beer by acting as an antimicrobial agent. For growing hops, you can use the rhizomes, which are the roots coming off of the female plants’ main stem, or the crown, which is the entire plant.
Hops History
Early settlers from Europe started brewing their own beer using hops they found growing wild in the New England area. However, in 1628, Europeans brought rhizomes from overseas and began breeding with the wild New England hops to create American Cluster hops.
It wasn’t long before states on the west coast started to dominate the market because of their ideal growing conditions. Today, the Yakima Valley in Washington is the largest producer of hops, but homebrewers have discovered that hops can grow everywhere.
How to Grow Hops? Getting Started
Before you plant, prepare the soil by ensuring that you have loamy soil that drains well. The pH should be 6-7.5 because this ensures the plant will absorb the nutrients it needs. A pH that’s too high or too low will affect growth. Adding sand will improve drainage while deep irrigation can reduce saltiness.
While preparing the soil, choose which hops variety you want to grow. You can make the decision easier by thinking of the types of hops you prefer and what will grow well in your area. There are over 120 varieties of hops, so also consider where you get the rhizomes and what kind of yield you want.
Once you choose, look for local breweries, nurseries, or homebrew shops that may have them for sale. It’s easier to find them locally because you’ll be able to get information on the individual plant’s performance, known diseases, and other history.
Once you receive your rhizomes, moisten them slightly, put them in a plastic bag, and store them in the refrigerator until you’re ready to plant them.
Location
Location has a lot to do with how well your hops will grow. Hops perform the best between the 35th and 55th parallels, but hops will still grow outside of these locations. While you may not receive as much sunlight as your hops desire, research your variety to see what it needs.
While Chinook grows well where it’s hot and dry, Golding hops love mild, moist climates. The USDA is a great place to research your hops varieties to see what they need.
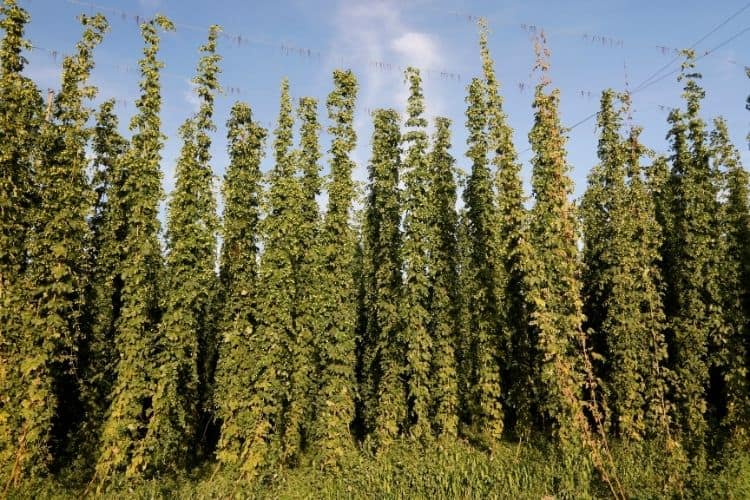
Growing hops is a commitment, because they can last up to 50 years. Make sure you give them climbing space with well-draining soil. South-facing is ideal because this is where they’ll get the most sun.
You do want to make sure your hops get some shade in the hot part of the afternoon so they don’t burn. Also make sure you use string to support the bines, or growing stem, as they grow upward.
You can create horizontal places for your hops to grow as well, by running the bine upwards 8-10 feet and then allowing it to grow horizontally for another 8-10 feet. This makes a great beer garden to enjoy them once you’ve made your homebrew.
The Soil
Your local gardening store should have pH testing kits you can purchase to monitor the soil. When the pH is too low, you can use wood ashes or lime to reduce the acidity. If it’s too high, sulfer and aluminum sulfate will reduce alkalinity.
When correcting your soil’s pH, make sure you follow the instructions so you use the appropriate application methods and amounts.
Planting
Dig a hole about a foot deep for each variety of rhizome you’re planting. Add about a shovel of compost to make sure the soil’s nutrients are available, then add 2 handfuls of mycorrhizal inoculum. This is a combination of plant roots and fungi that help the roots absorb nutrients and grow.
After the soil is prepared, put 3-6 rhizomes about 2 inches below the surface of the soil with the shoots pointing upward. Make sure every rhizome variety is separated by 3-5 feet so they don’t mix roots.
Put an inch of compost on top of the rhizomes and then cover it with 2 inches of mulch. This prevents weeds from growing and will protect your hops from a late frost.
While hops can absorb hydrogen, oxygen, and carbon from the air, you may also purchase other nutrients your hops need like N-P-K (nitrogen, phosphorus, and potassium). Simply sprinkle it at a rate of one handful per plant.
You can look up more specific fertilizer schedules for your area, but a good general rule to follow is to fertilize when they sprout, again 3 weeks later, once in the middle of summer, and a last time when they start to flower.
You can identify growth stages to better understand your hops and what they need for a good yield. The stages are dormancy, spring regrowth, vegetative growth, reproductive growth, formation of cones, and preparation for dormancy.
Interesting Read: What Are Hop Shoots and Why Are They Worth It
Growth and Care
Your hops probably won’t yield a lot in the first year. It will first focus on establishing the root system and crown. Subsequent years will see more cones, and before you know it, you may have more than you know what to do with.
During the first year, don’t prune anything at all. The second year, you can prune the first shoots to encourage secondary shoot growth.
During the third year, your mature plants will require you to prune the roots. If you don’t prune the roots early in the spring, the rhizomes will spread, keep water and nutrients away from the shoots and crown.
As soon as your shoots are 1-2 feet tall, you should pick 2-3 of them that you can train to grow upwards. While you may want to keep every bine, keeping fewer of them will result in a better yield.
Don’t do any training on cool or cloudy days because the bine may snap. Continue to trim back any untrained shoots at the ground.
As your hop shows little white buds, you can trim foliage and branches from four feet down to help air circulate and prevent disease. Be careful during this process so you don’t break the main stem. By late summer, you should be letting this bottom foliage grow again to ensure your plants are hardy and vigorous the next year.
Watering
First year hops need a lot of water. The older your hops get, the less frequently you’ll have to water. Drip irrigation systems are best for hops because overhead water can foster disease growth.
Picking
It’s important that you don’t pick the cones too early, even though you might be excited that you’re finally seeing them. The hops should be over-ripe when you pick them. Harvest varies by location but could be anywhere from the middle of August to the end of September. More aromatic hops will display cones first.
Here’s hot to check your hops for ripeness:
- Squeeze the cone lightly every now and then. When it starts feeling light and dry, they’ll return to their normal shape quickly after squeezing. This is when they’re ready.
- You can also pick one, smell it, and roll it around in your palms. If it smells pungent, like cut grass or an onion, it’s ready.
- Listen for a sound like a cricket when you roll the hop near your ear.
In the first year, pick the cones, but don’t cut the bine down until it dies. That way the nutrients travel back down to the roots to help them through winter.
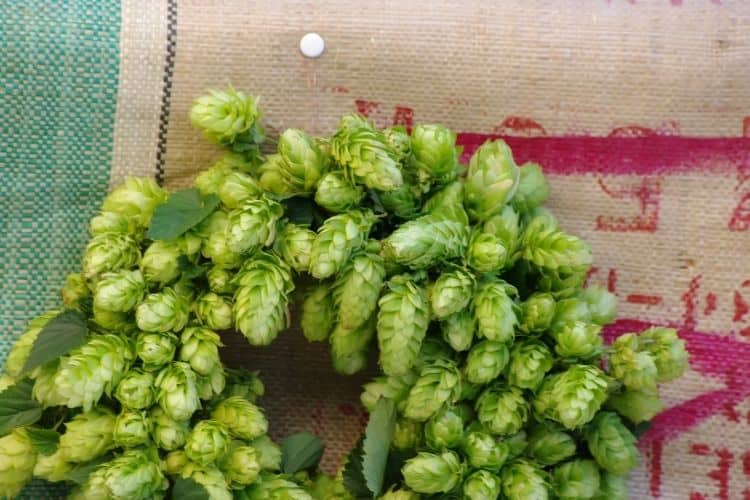
After the first year, you can cut the bine earlier, but don’t damage the lupulin glands. Mature plants will produce 1-2 pounds of dried hops per year.
Drying
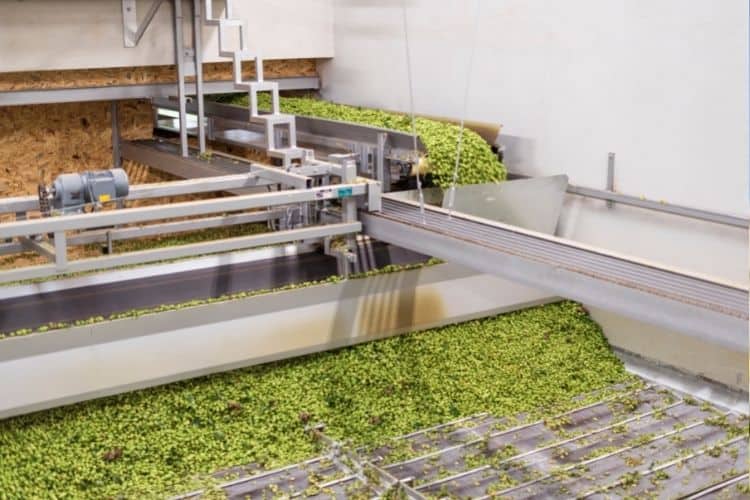
You’re not finished, just because you picked your hops. If you prefer a fresh hop brew, put your hops straight into your kettle. If you would rather dry them first, you’ll need to get just the right balance of timing, moisture, and heat.
Drying process should take no more than 3 days, but you can speed it up with the oven. Check them often and don’t turn it up higher than 140 degrees.
A drying screen can protect your hops while you allow them to dry. This keeps them dark, but you’ll still need to fluff them occasionally so the moist hops at the bottom come to the top. Using a fan can also speed it up.
Even though you’re drying them, they still need about 8-10% moisture to prevent mold. You can tell if you’ve dried them enough if the stem on the cone almost snaps in half. Vacuum seal your hops and put them in the freezer.
Pests and Disease
There are several common pests and diseases you may struggle with when growing hops at home. Watch out for these and take the proper precautions to care for your plant if you notice the signs.
Hop Aphids
Hop aphids feed on your cones as they develop. This causes the cones to turn brown. It will also leave sugary honeydew on the cones, which causes mold, which will reduce your productivity. It can also transmit plant viruses.
Spider mites
Spider mites suck the juices from plant cells. This turns your leaves brown, but a severe infestation will produce white webs and cause defoliation. These are dangerous when it’s warm and dry, but shouldn’t be a problem if you water your hops like you should.
Downy Mildew
Downy mildew will infect shoots before they emerge, and you won’t see signs until the shoots come up. They are brittle and stunted. They won’t be able to climb, and it often infects flowers when they bloom as well. It will rot and completely destroy roots.
Powdery Mildew
Powdery mildew infects cones and turns them a reddish brown color. This fungus will complete its entire life cycle in just 5 days when it’s humid and cloudy.
Verticillium Wilt
Verticillium wilt comes in a nonlethal and a lethal strain. The lethal strain will cause rapid death of side arms, leaves, or the entire plant. Nonlethal strains will simply wilt your leaves and vines.
Hop Stunt Viroid
Hop stunt viroid is a pathogen that stunts the growth of your hops. It can also reduce your alpha acid content by as much as 80% per acre. The most dangerous part of this pathogen is that you won’t see the signs for 3-5 growing seasons.
Prevention
Monitoring your hops constantly will help you prevent an outbreak that destroys everything. Proper care and nutrition will also prevent disease or pests from attacking. Creating an environment that doesn’t foster disease or attract pests is the best way to be proactive.
Your local nursery can help you with more drastic measures, should it come to that.
Product Recommendations
If you’re wanting to grow your own hops at home, you can probably find a local nursery or craft brewery that has some. However, here are some products you may also want to try.
Yakima Valley Hops
The Yakima Valley leads the United States in hops production, so ordering rhizomes from them just makes sense, doesn’t it? Yakima Valley Hops has several different varieties from which you can choose including Cascade, Centennial, Chinook, Triumph, CFZ, and Cashmere.
You can order 3 rhizomes or a bundle of 50. They’re reasonably affordable, and you’ll get fresh rhizomes that were hand-harvested from local valley farms. However, you have to order them early in the season, because they sell out fast.
Thyme Garden Organic Hop Rhizomes
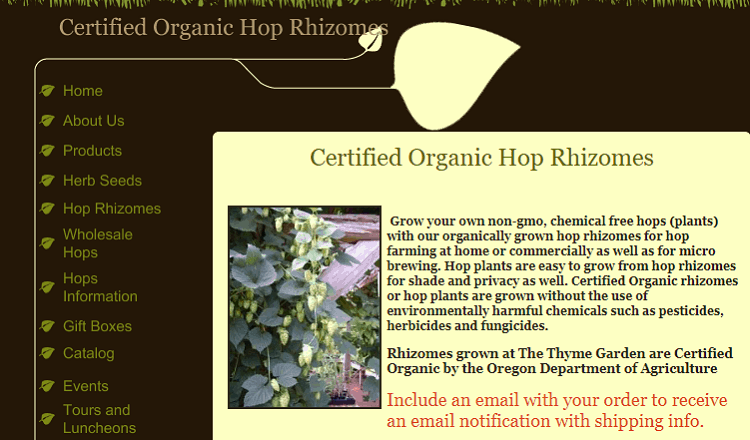
Thyme Garden takes orders in the fall for the following spring, so they’ll sell out quickly, too, especially since they’re certified organic. These are non-GMO hops free of chemicals and they’re great for growing at home or commercially.
These hop plants were grown without the use of herbicides, pesticides, or fungicides, so the rhizomes you’re getting are pure and healthy. These hops are certified organic by the Oregon Department of Agriculture.
You can order varieties like Brewer’s Gold, Cascade, Cashmere, Chinook, Kent Golding, Mt. Hood, Magnum, Pearl, Star, Sterling, Willamette, Yakima Gold, Saaz, and more.
Northern Brewer
Northern Brewer offers more than just rhizomes. They also have brewing supplies, recipes, ingredients, and taps. If you want a one-stop shop for all of your brewing needs, this is the place to go.
They offer varieties like Willamette, Comet, Crystal, Nugget, Sterling, Magnum, Mt. Hood, Cascade, Centennial, Chinook, and more.
FAQs
If you’re thinking about growing hops, there are some other things you need to know. These frequently asked questions will clue you into some other important information.
Question: How Long Does it Take to Grow Hops?
Answer: To start flowering, hops need 120 frost-free days after they’re planted. You shouldn’t plant them any later than May, because this will negatively impact their growth. You won’t get much yield in the first year, but by year three, you’ll have a fully mature plant, if you care for it properly.
Question: How Deep Should Soil Be for Hops?
Answer: While you only need to plant your rhizomes at about 2 inches deep, you should ensure you have at least a foot of soil. This allows you to water to a depth of about 4 inches and for the roots to grow.
Question: Are Hops Difficult to Grow?
Answer: Hops can be difficult to grow because they need so much attention. While they’ll mature quickly and produce good yields when cared for properly, the time it takes to care for them can be extensive.
Question: How Much Hops Do You Get From One Plant?
Answer: Each mature plant can produce 1-2 pounds of dried hops per year.
Question: Do hop plants spread?
Answer: Hops will spread through their roots, which extend and produce bines every year. It’s important that mature plant roots are pruned to prevent them from spreading too far or mixing with other varieties.
Final Thoughts
If you’re an avid home brewer, you may want to consider growing your own hops. It’s not easy, and it will take a lot of work, but for many, it’s worth it. Once you get the hang of it, it gets easier, and you’ll enjoy the fruits (or beers) of your labor.